Images
Image Creation
Navigate to the settings tab and notice the submenus displayed. All marketers will see the Images submenu. (If you possess administrator credentials, you have access to an additional six submenus, please click here for more information on the additional submenus).
Let's begin with guiding you as a marketer with the "How To" of uploading a new image (or click here to go directly to learn about Managing your images).
All users with Administrator, Creator and/or Trainee roles have the ability to add images to the VCE image library.
Follow the steps below to upload an image:
- Select Images from the Settings submenu.
-
Click
 to access images from your computer.
 - Select images to upload onto your VCE application.
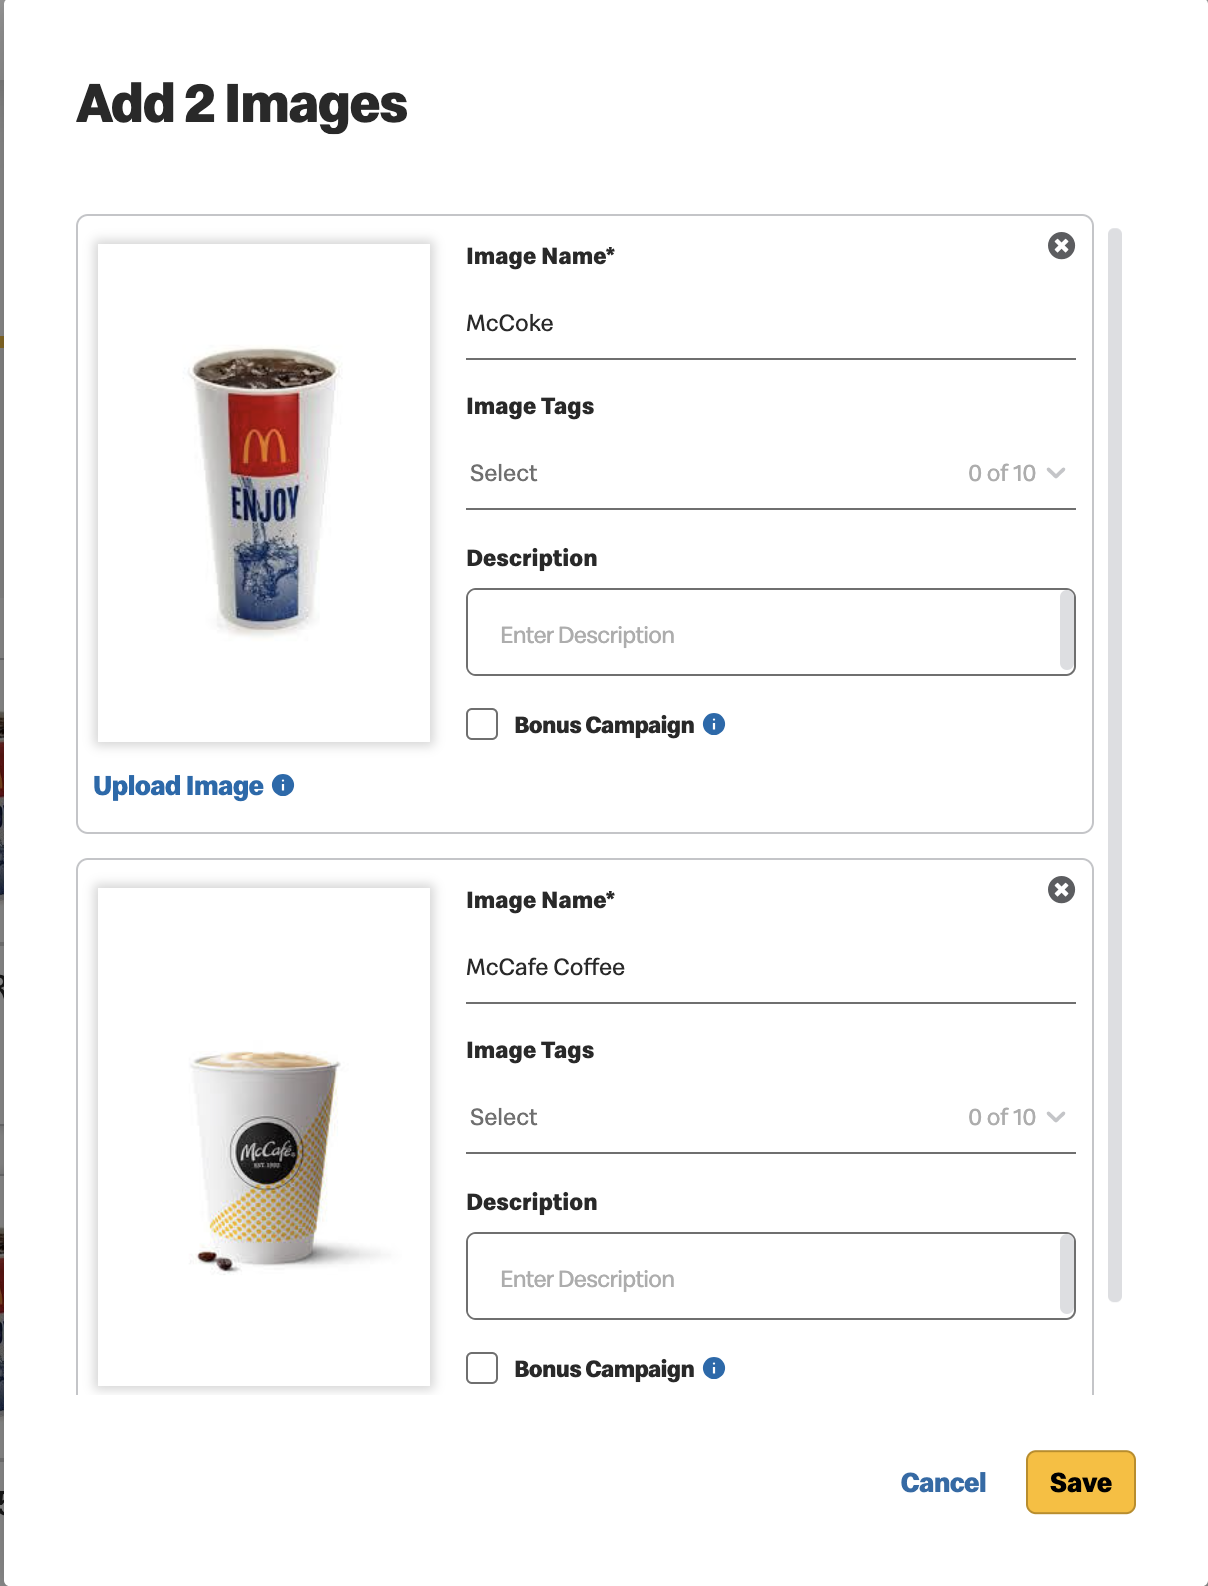
- If you would like to add multiple images, press and hold the Shift key, select a maximum of
30 images, then click Open. A window displays all selected images and allows editing from one
screen.
- Each image can be a maximum of 100KB and the
following formats are acceptable:
- png
- jpg
- jpeg
- gif
- Each image can be a maximum of 100KB and the
following formats are acceptable:
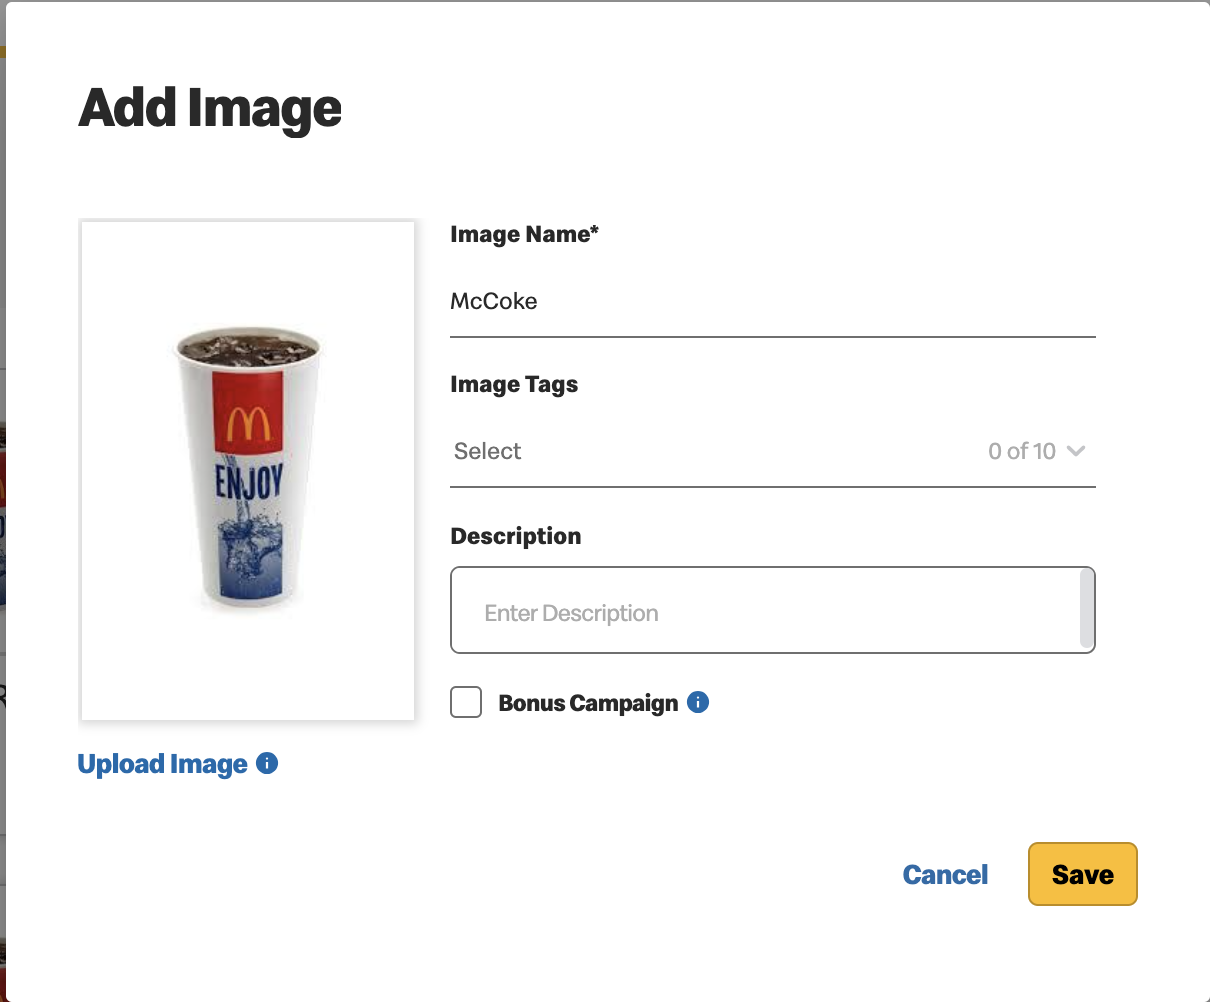
- Complete the following mandatory fields:
- Name - This is a mandatory free text field. By default the file name appears or provide a name of your choice. (Allows up to 200 characters).
- Once all mandatory fields are complete, the action buttons at the bottom of your window
are enabled.
Notice there are additional fields to add detail describing the image. The following fields are optional and are provided for your benefit:
- Tags - This is a free text field or select from existing text.
- Description - This is a free text field (Allows up to 200 characters).
- Bonus Campaign Checkbox – By default, images are only available for use in a bonus campaign after an offer using the image is approved. Checking the bonus campaign box indicates that the image should be instantly made available.
- Click Save or Cancel
- Save - To create the record. The image is now visible in the image library. A toast assures you that images have been successfully added.
- Cancel - To cancel record creation. If you select cancel, you will be asked to confirm.
Image Management
Administrator, Creator and Trainee roles can add new images and/or edit existing ones. The images appear in the order they have been uploaded.
The first part of Image Management is made easy with filtering options. Choose to view all, or filter to focus on the images of interest.
You may filter by:
- Status
- Tags
- Keyword search
- Name
- ID
- Description
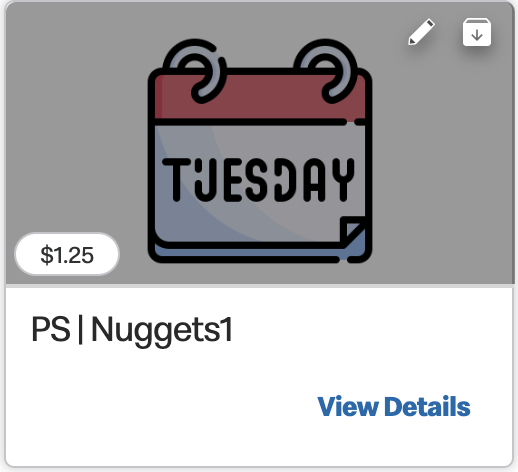
Once you are viewing the images of interest, hover over any image to display the three management tools.
 - Select to view the Image details. Notice the action buttons at the bottom of this
window. (See below for further details on the Actions available).
- Select to view the Image details. Notice the action buttons at the bottom of this
window. (See below for further details on the Actions available). - Opens the image in edit mode to allow for
updates as needed.
- Opens the image in edit mode to allow for
updates as needed. -
 /
/  -
Archives/Unarchives the image.
-
Archives/Unarchives the image.
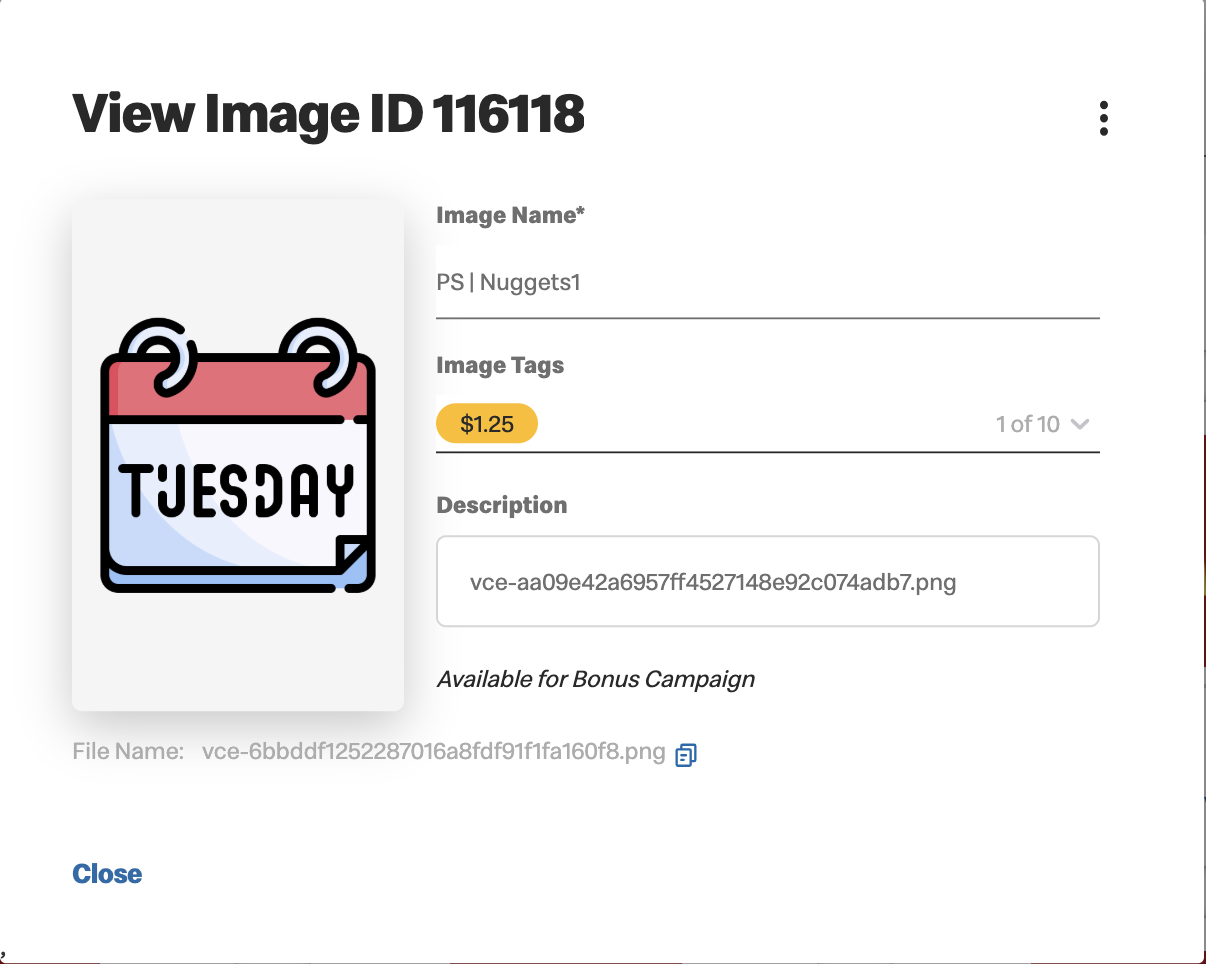
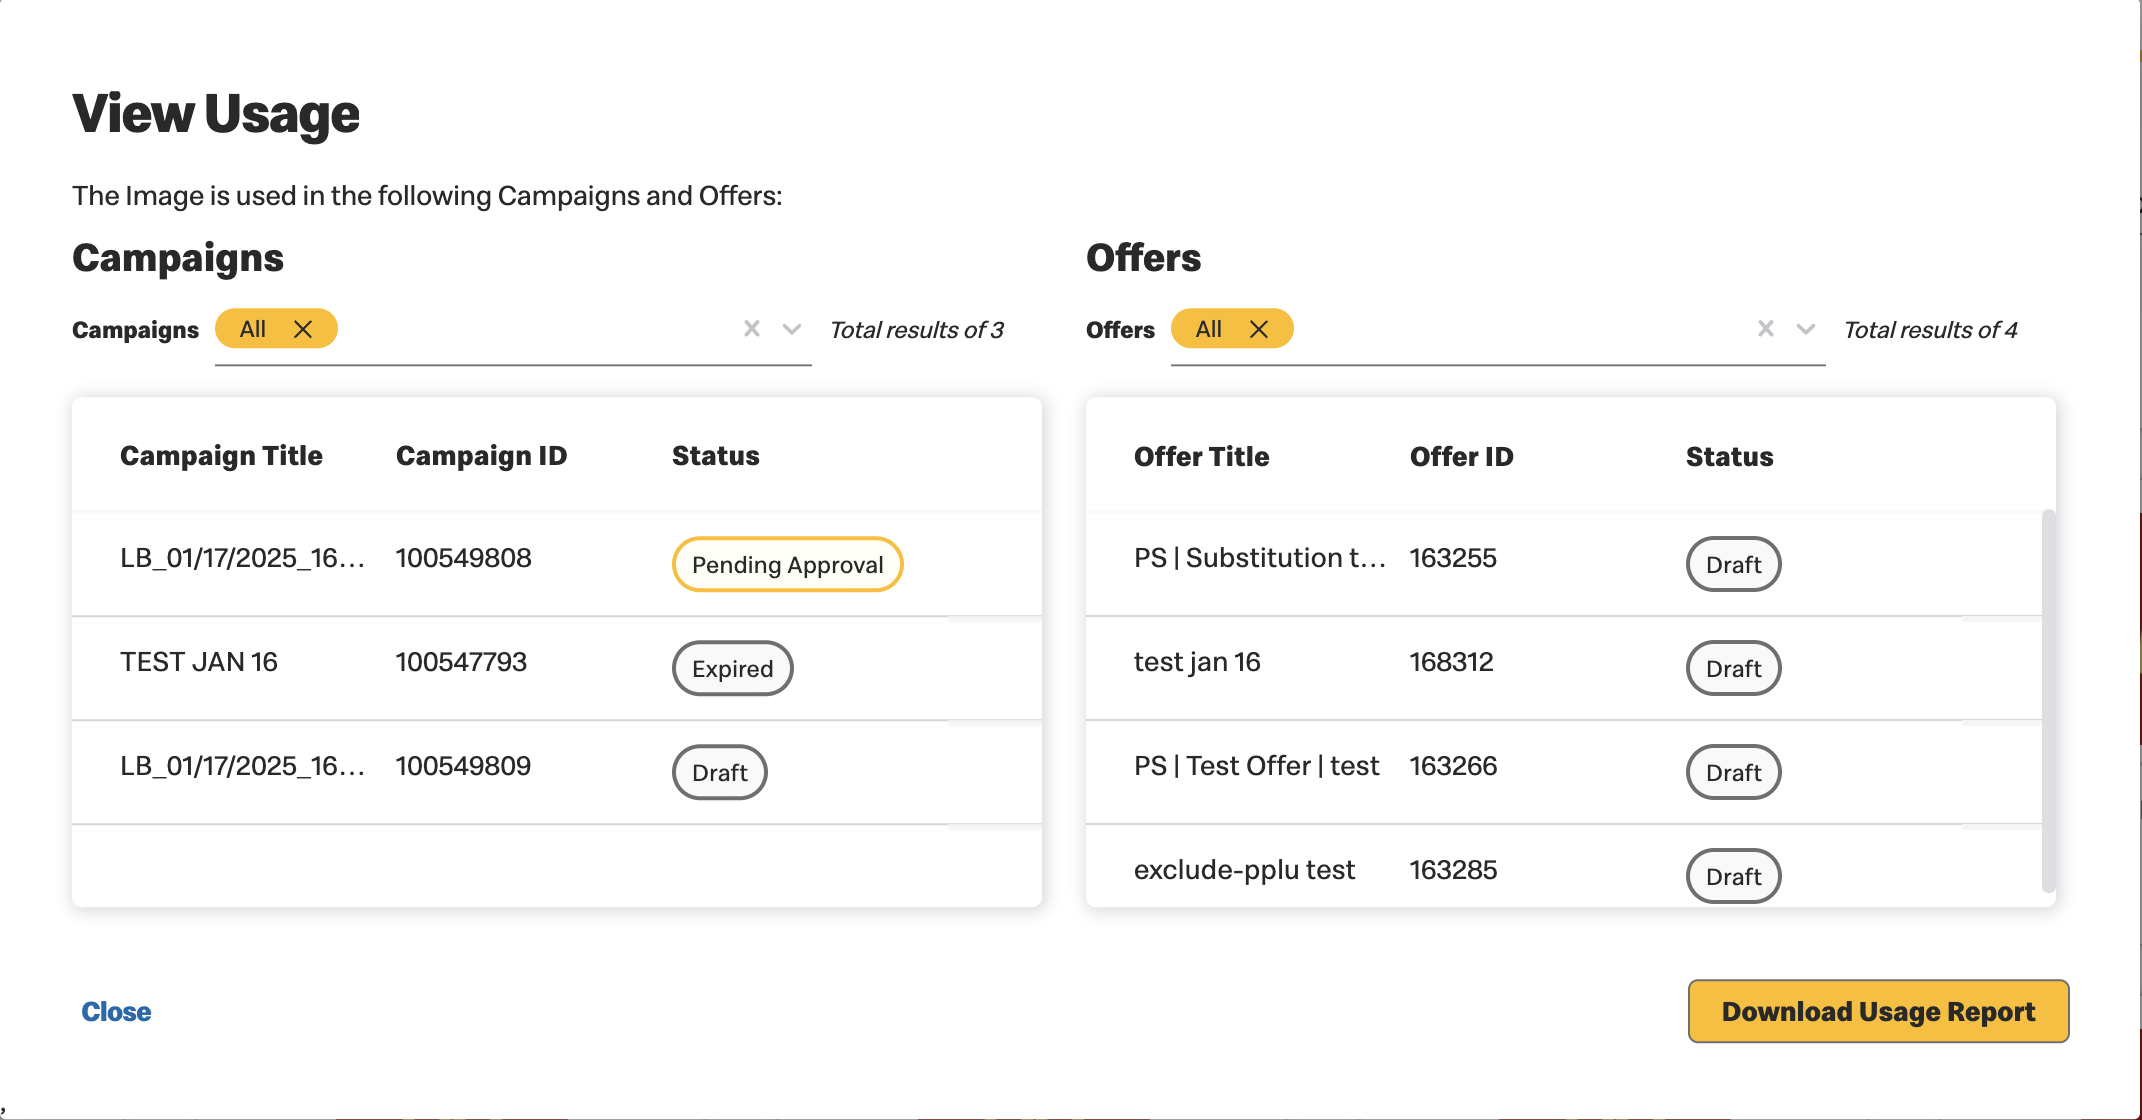
Actions available from the View Image window:
- Image usage - Click to view the Campaigns and Offers where this image is currently in use.
- Download Usage Report - From any window that offers the
 you can click to generate a csv file of the
details.
you can click to generate a csv file of the
details.
- Download Usage Report - From any window that offers the
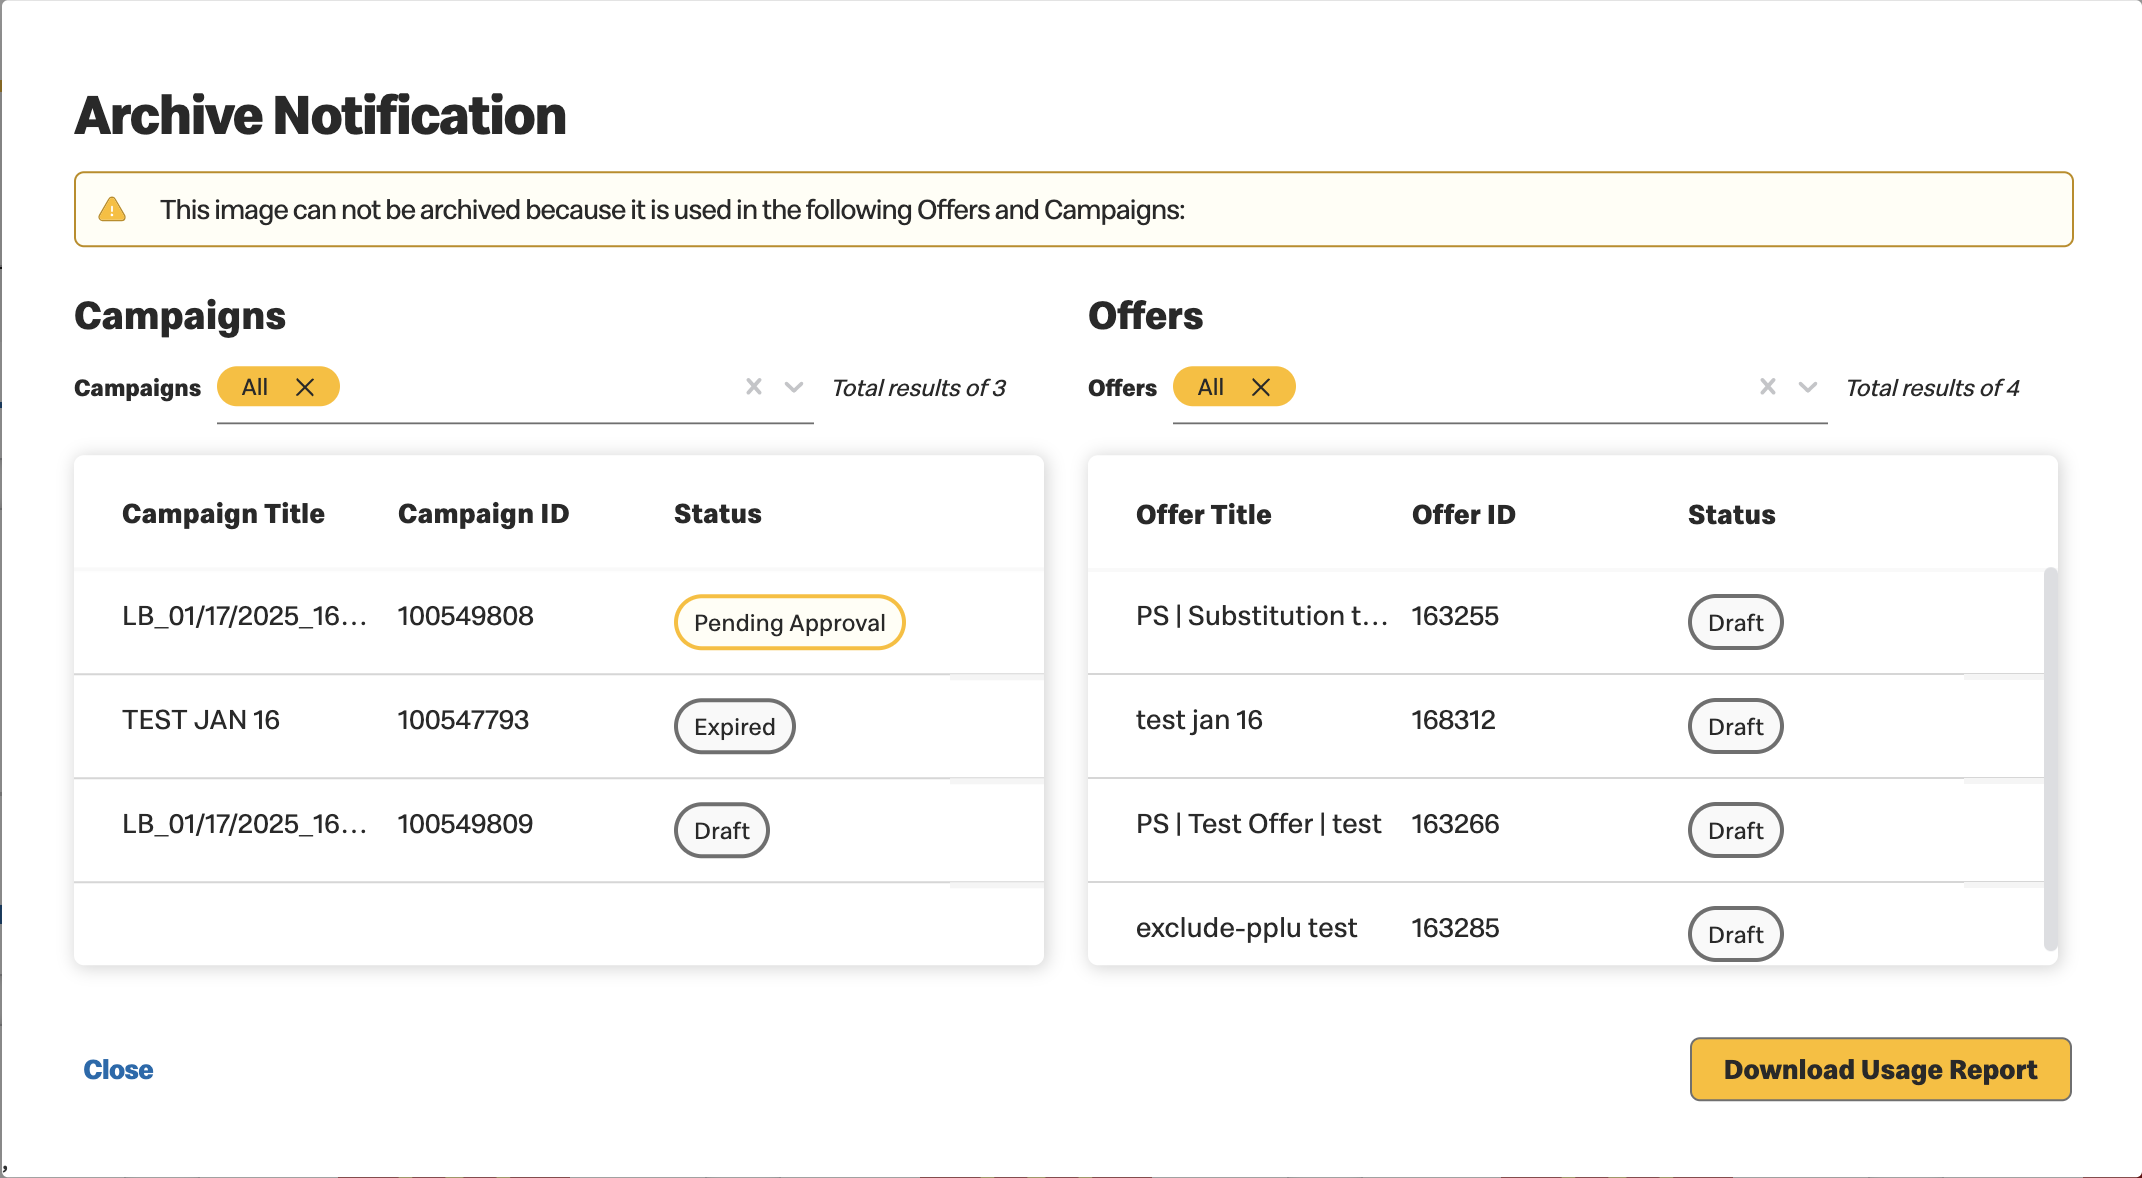
- Archive or unarchive an image. Archiving unused images helps you keep a cleaner UI.

|
Images can only be archived when:
|
If the Image is not currently in use, a toast assures you the Image
has been successfully archived.
When the image is in use, a window displays the campaigns and
offers using that Image.
- Edit - To edit image properties. See description below
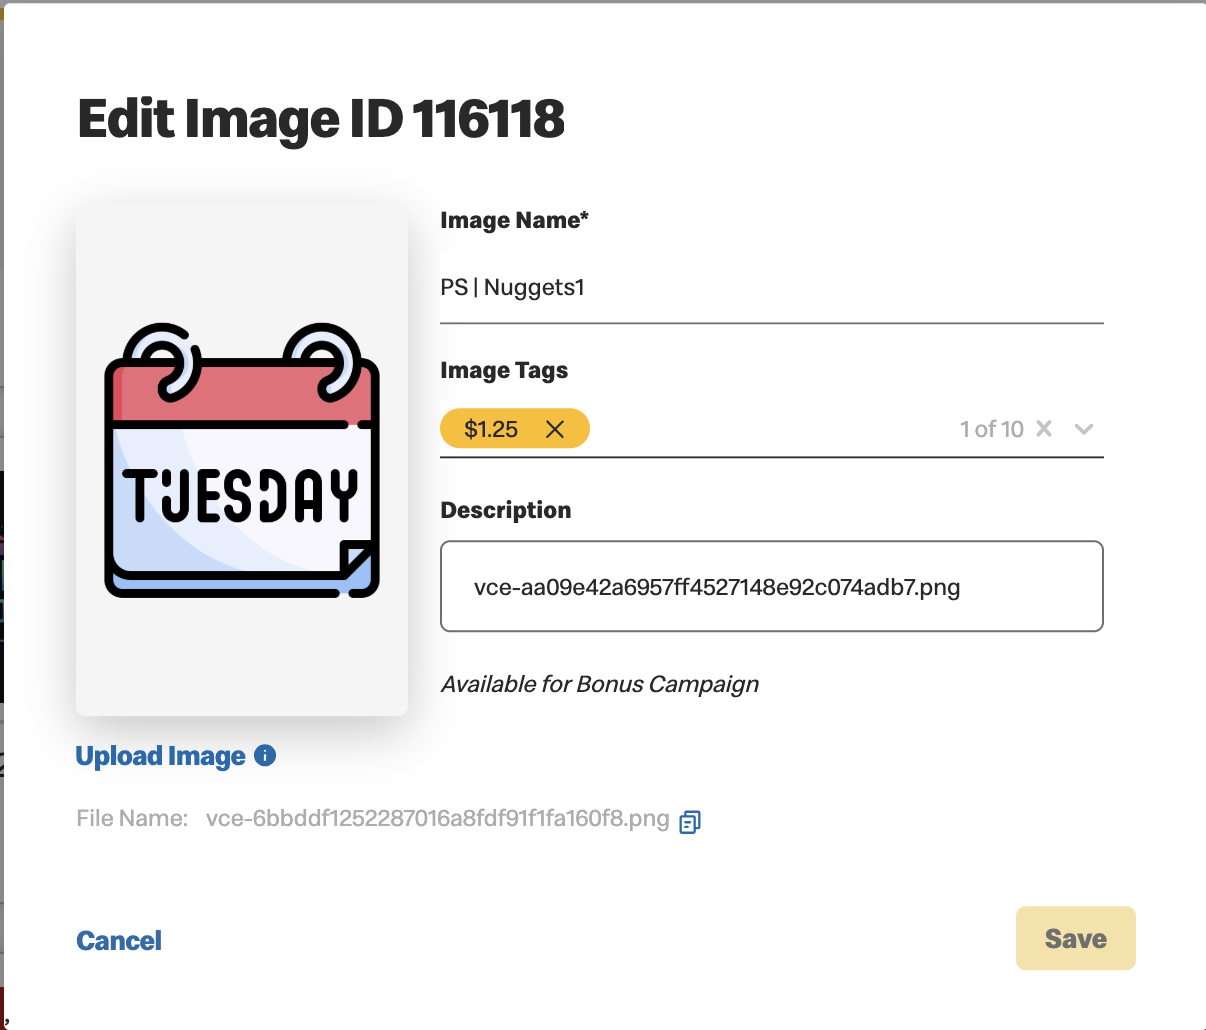
There are several editing options:
- Replace the image file - when an image that is being used is replaced, any offer using that image is returned to draft status and must go through the approval process once again.
- Add and remove tags
- Edit the image description
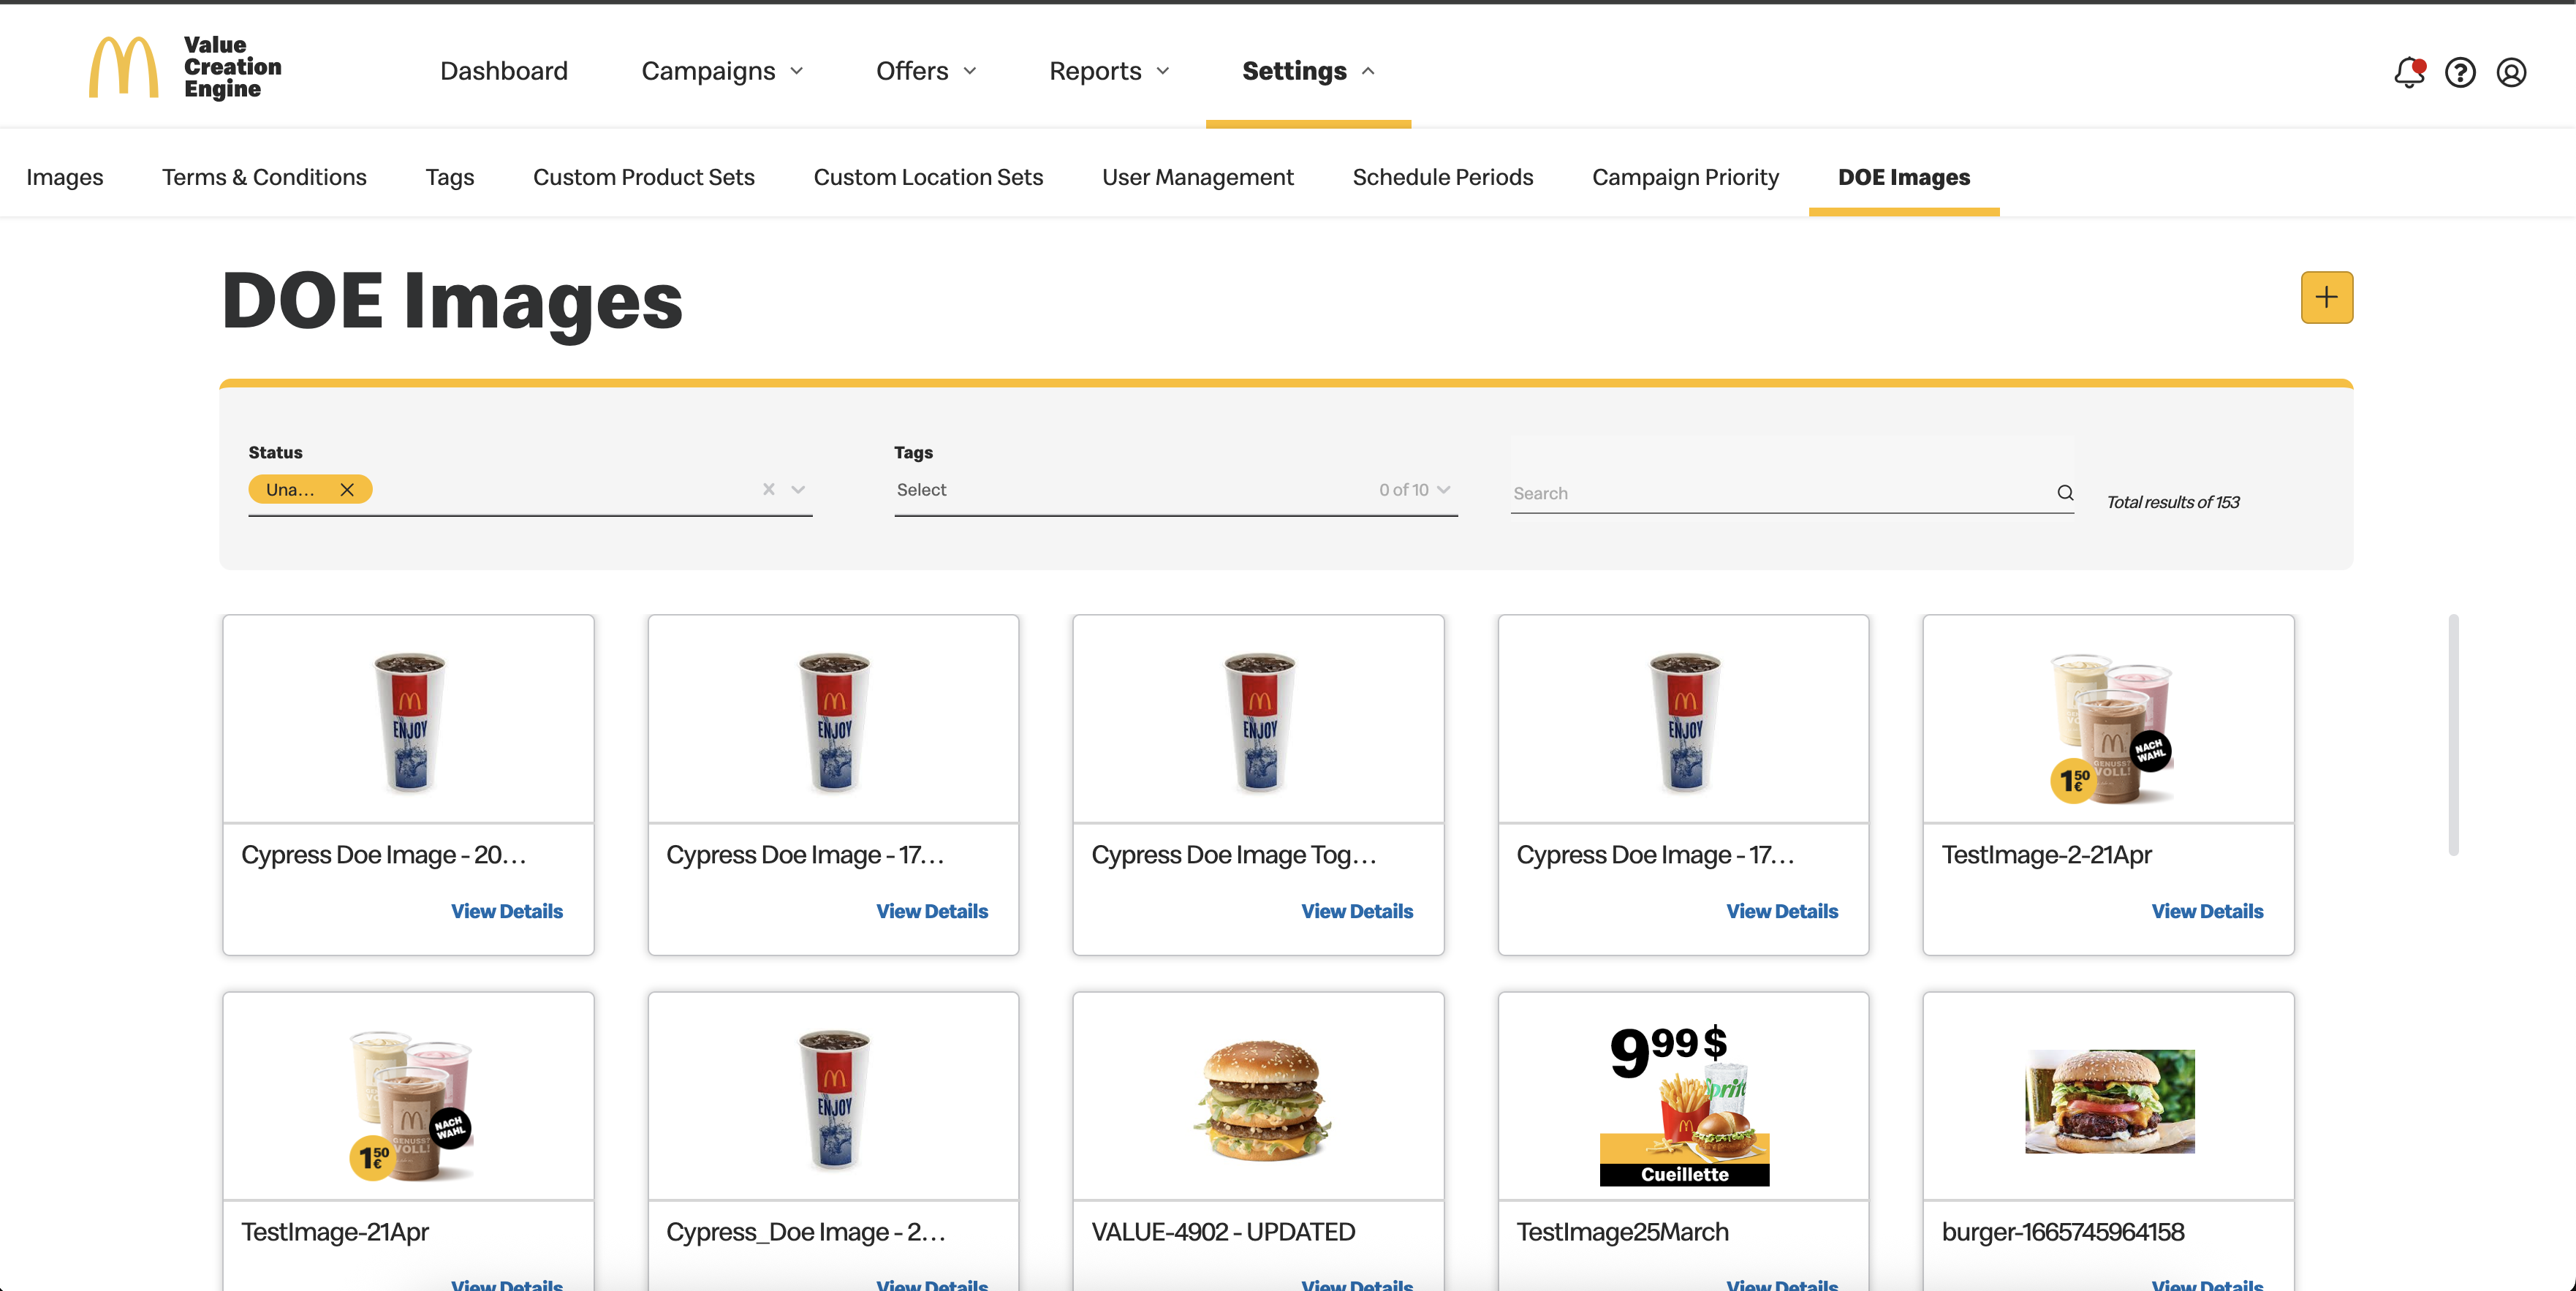
DOE Image List Screen
- Access and Navigation
- All user roles can access the DOE image list screen.
- A new tab, "DOE Images", will be available under the "Settings" menu.
- Clicking on this tab will navigate users to the DOE image list screen, displaying only DOE images.
- Screen Functionality
- Filter and Search Options: No changes; these options remain the same as Business As Usual (BAU).
- View, Edit, and Archive Buttons: No changes; functionality remains as BAU.
- Impact on Existing Features
- DOE images cannot be used in BAU Offers and vice versa.
-
Adding a New DOE Image
- Access Permissions
- Admin: Can add, edit, view, and archive DOE images.
- Creator/Trainee/Viewer Users: Can view images and download usage reports.
- Navigation
- To add a new DOE image, click on the "Add" icon in the DOE image list screen. This action navigates the user to the DOE Add Image Screen.
- Upload Process
- Image Upload: Admin can select an image to upload from their local machine.
- Bulk Upload: Not available for DOE images
- DOE Image Fields
- Image upload (Mandatory)
- Image name (Mandatory)
- Tags
- Description
- Language Selection Checkbox
- Displayed based on market-configured languages.
- At least one language selection is required.
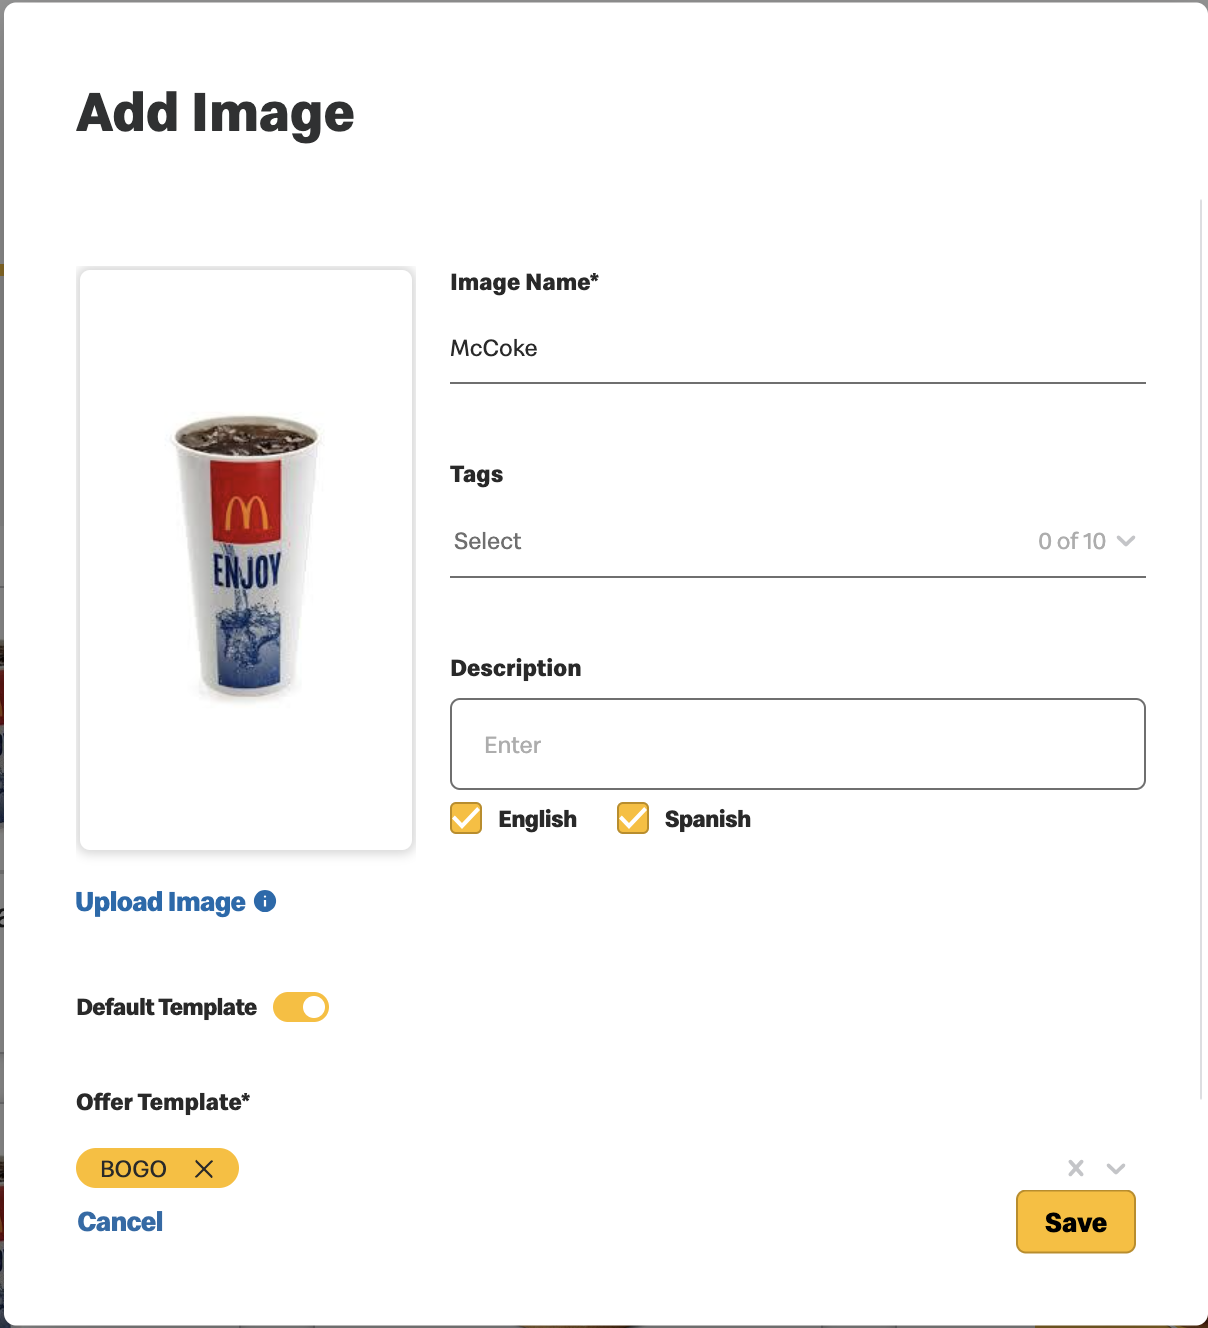
- Default Template Toggle Button
- When Toggle is ON:
- A mandatory multi-selection dropdown for available offer templates is displayed.
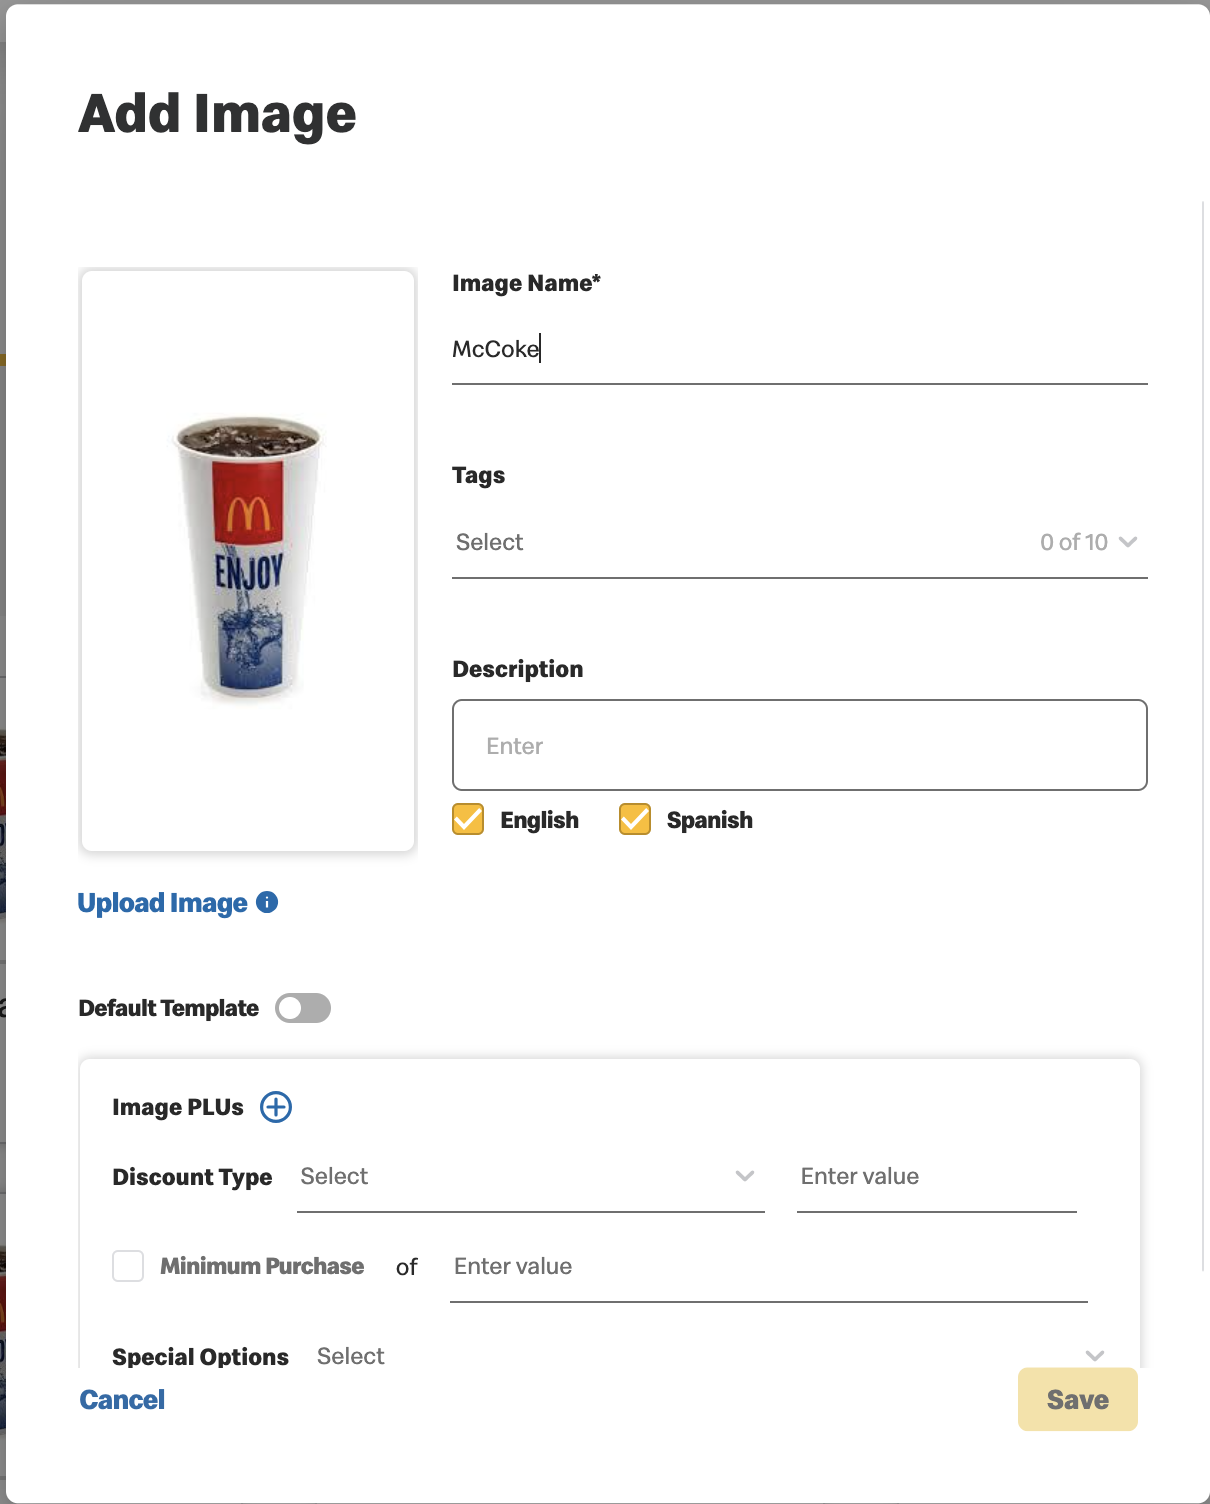
- When Toggle is OFF (Default State):
- At least one of the following three options is required to upload a DOE image.
- Image PLU Selection: Allows a maximum of 15 quantities and the addition of up to 10 row items.
- The "Select Products" button opens the product selection modal (no changes from BAU except the product set selection).
- Discount Type Dropdown: Options include $ Off, % Off, Free, and Fixed Price.
- Selecting a discount type enables the Minimum Purchase Checkbox.
- Entering value is mandatory for all discount type except “Free”
- Special Options Multi-Select Checkbox: Values are based on predefined configurations.
- Users can upload images via the modal and select metadata options including:
- PLUs
- Discount Types
- Minimum Purchase within Discount Types
- Special Options
- Metadata Matching Process:
- When an offer recommendation is uploaded, VCE attempts to find a match based on the metadata provided.
- Metadata matching involves comparing the incoming offer recommendation's metadata against the previously uploaded metadata.
- Matching Rules:
- The Image metadata object in the incoming offer recommendation can include up to three sets of PLU or Discount type or Special options..
- VCE performs a one-to-one match of the incoming metadata with the stored metadata.
- First Match Logic:
- VCE utilizes a first match logic for assigning images to offers based on the metadata provided in the offer recommendation.
- It processes the image metadata in the exact order it is provided in the offer recommendation input.
- The first matching image that meets the criteria is assigned to the offer, prioritizing the order of appearance in the metadata rather than identifying the best match based on additional attributes.
- If there are two identical images, the recently uploaded image will be selected.
- Default Fallback:
- If no match is found between the metadata of the incoming recommendation and the stored metadata, a default template image will be attached to the offer.
- Save Button Activation
- The "Save" button is enabled only after all mandatory fields are completed.
- Clicking "Save" stores the image.
-
Viewing and Editing DOE Images
- The View and Edit functionalities work as they do in BAU but now include the new fields for language, template, and additional configurations.
|
|
Images with text overlays are not currently permitted and should not be uploaded. |
The following fields are added to the Add New DOE Image screen:
|
|
Uploading a default image for each template is mandatory. This ensures that if the image selection service cannot find a suitable match based on metadata, it will automatically use the default image as a fallback. Marketers can assign a unique default image to each template or reuse the same default image across multiple templates. |
Previous Topic Next Topic